


A lifelong obsession, the building of a Flying Flea HM293
By Roy De Stadler

When I started work in 1956, however, the dream was still with me and I wrote to the Air League hoping to get some positive news. Instead, I was told "This aircraft will certainly not receive a Certificate of Air-worthiness in this country (UK) and it is not possible to advise you to undertake its construction". So that was that! Or so I thought. Nevertheless, that book has influenced my life with a persistence that would not go away and I would occasionally read parts of it just to experience some of Henri's vivid and arresting descriptions of his experiences and to share in his enthusiasm and vitality.
About the year 2000, I acquired access to the internet and one day I typed "Flying Flea" into Google hoping to find some historical reference. Unexpectedly, I was amazed to learn that the Flying Flea was far from dead, indeed it had not only survived the setbacks in 1935/6, but was now once again in a period of revival. Well, that started a storm! I searched the Web for drawings and eventually decided to buy Fred Byron's modernized and updated package, and am very glad that I did. Fred's drawings are excellent and easy to follow. Fred is an Australian and his HM293 is still flying as good as new after about 35 years. It continues to grace many airshows and get-togethers in Australia.
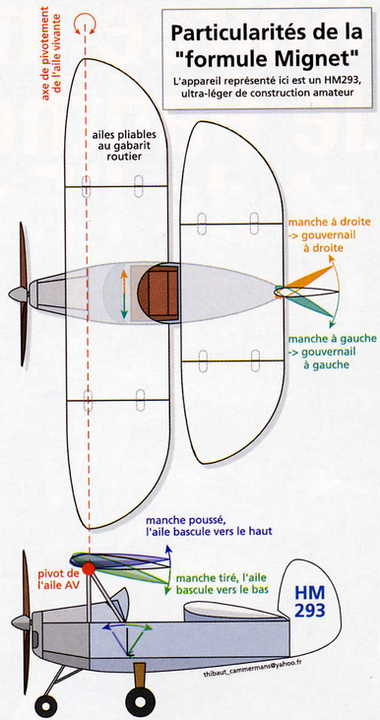
To get to the aircraft, the HM293 is a single seater with two staggered wings. The wings are in 3 sections with the wing tips hinged to the centre sections so that they can fold up. There are no ailerons or elevators. The whole front wing pivots and the AOA is controlled from the control column. The rudder is also connected to the control column. The rear wing is fixed. Banking occurs automatically when the rudder is applied. Foot pedals are connected to the tail wheel to facilitate steering on the ground.
Construction started in 2004 and was nearly complete in 2015 when I had to put it aside until 2019 for personal reasons. In 2019 I finished off the few things that needed to be done and received a Proving Flight ATF. Some modification was needed after the first test flight and that, plus numerous delays, not least of those being COVID 19 restrictions, slowed down the process, but today that is all over. The aircraft's performance is satisfactory and all that remains to be done is to is to complete the trials and build up hours.
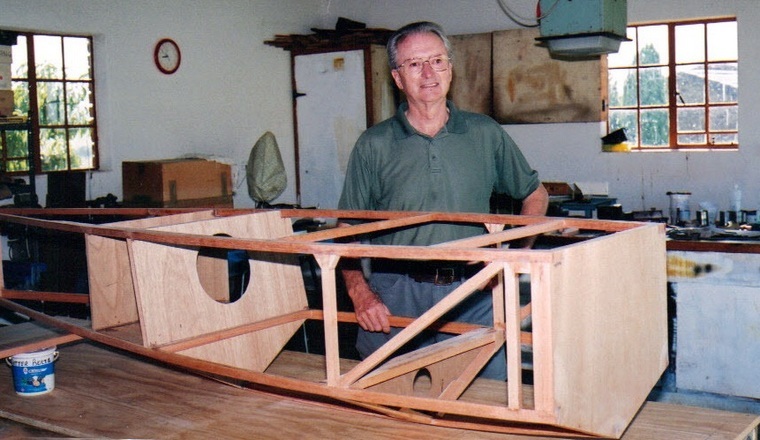
The fuselage structure
Mignet's designs were based on materials you can get from your local hardware shop, but Fred Byron's drawings are modernized using better quality materials.
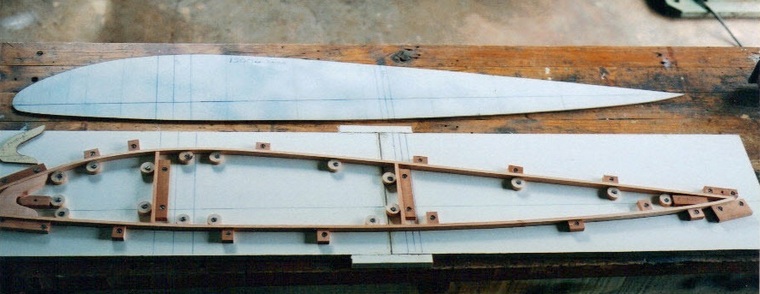
Making the wing ribs
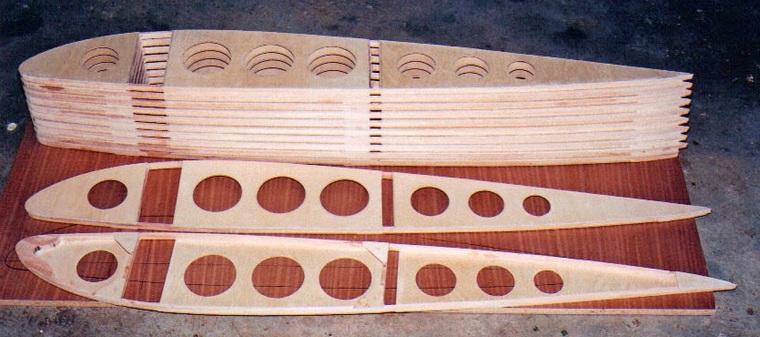
Completed wing ribs
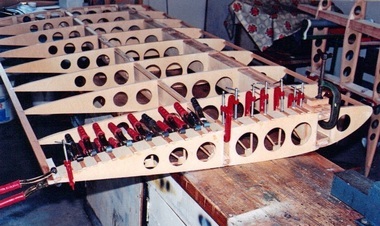
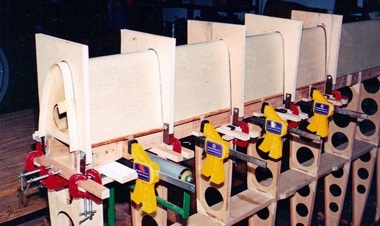
Rear wing center section…..Gluing the ribs

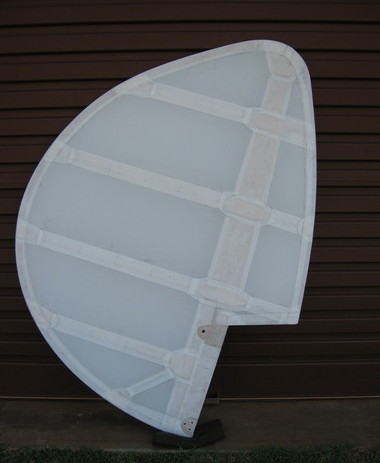
Front and rear wing framework
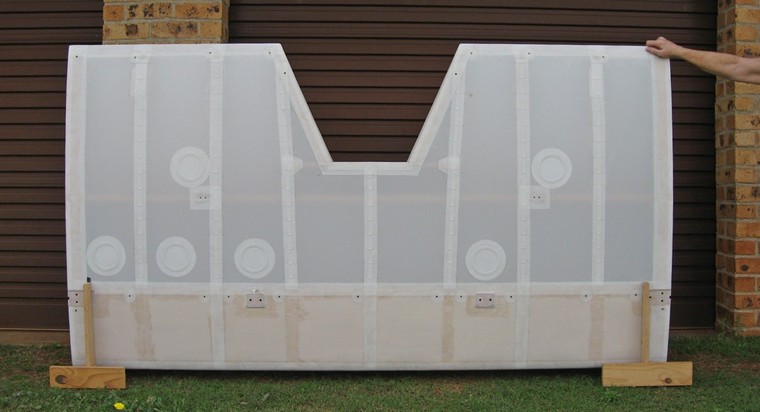
The covered wing center section
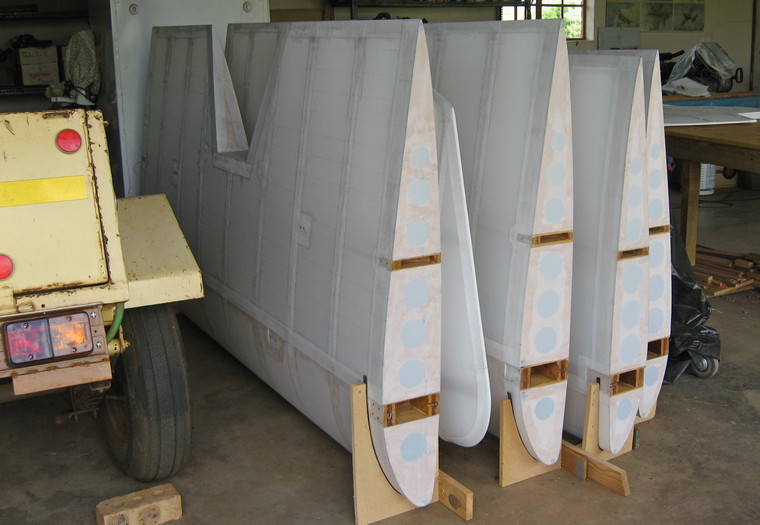
Covered wing sections

The rudder frame work and the covered rudder
The design is typically wood and fabric. With encouragement from the late Mike Spence, who was my local mentor and AP, I researched the use of Saligna (Blue Gum) and used that for the framework. It is freely available and it is easy enough to select suitable straight-grained planks, avoiding the denser wood. The plywood used in the flying structure is all Finnish birch, aircraft quality. For glue, I used a thixotropic epoxy Araldite glue.
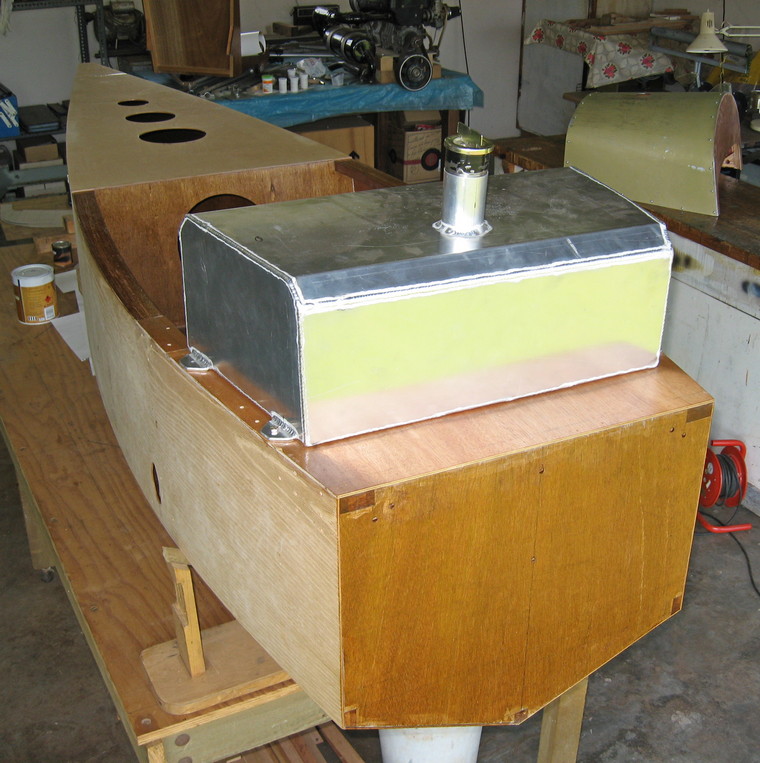
The fuel tank fitted
For the steel metal work, I used Chrome-Moly 4130 and also a Swedish steel, Domex 10, an excellent cold-formable steel with slightly greater strength than Chrome-Moly. For the aluminum fittings, I used 6061-T6 and 2024-T3 as specified. Regarding hardware, I opted for the American AN system, which although expensive, is of assured quality and easy to use.
The wings and rudder are covered with non-certified fabric bought from Aircraft Spruce. The paint system includes a two-component motor vehicle paint with a softener added.
Major Tools - I have only a modest workshop and I largely made do with what I have:
Circular saw and planer/thicknesser combination - With this I could buy raw planks and cut what I wanted.
Jig saw - I used this extensively on wood and ply, a band saw would have been nice to have, but not essential.
Bench sander - useful to trim bits to size. I also used it to clean up the ribs and other wood parts after gluing.
Drill press - essential!
I started construction with the fuselage. It was built upside down on a flat bench. The construction is simple in design and gave me a chance to build up experience with fitting and gluing. Then I made the rudder which is essentially a simplified wing. Finally, the wings followed. There was a lot of work there, each wing is in three sections and there is the need for lots of clamps and jigs. Sounds easy, but you had to be careful to plan it out so that you didn't glue yourself into a corner!
 Some of the handmade metal fittings
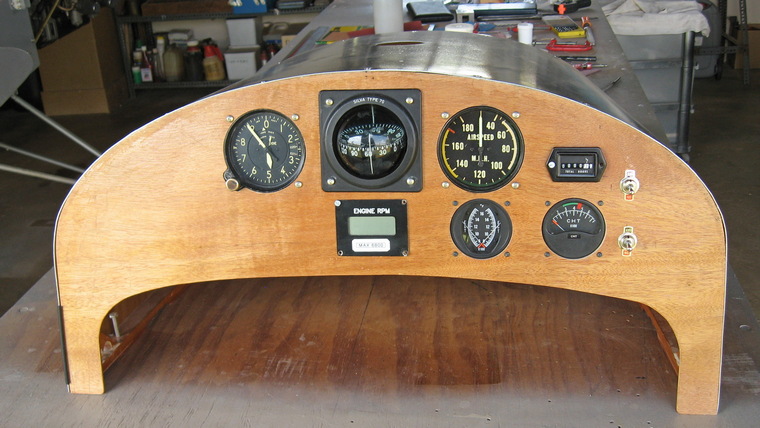
The instrument panel
I made the metal fittings the hard way by hand and the fitting thereof had to be done very, very carefully as there was no room for error. When you look at the hinges and locks on the wings, you realize that there can be no error, too much depends on your workmanship.
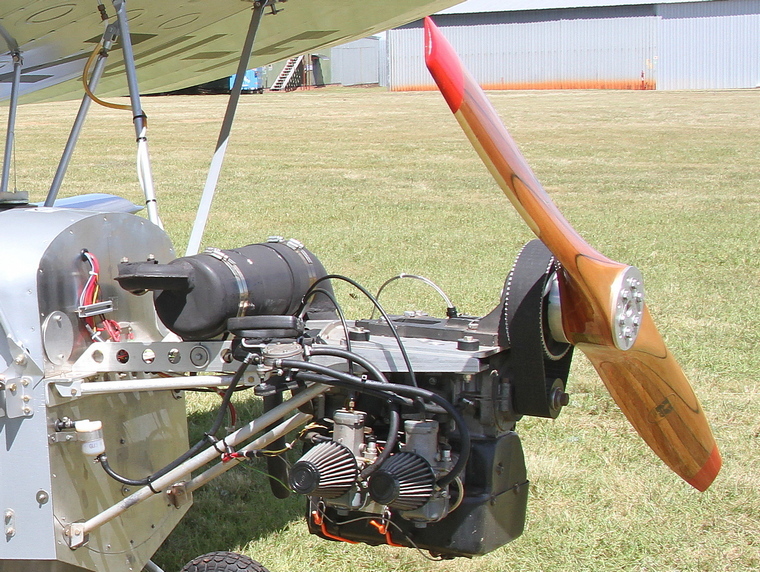
The upside down Rotax 503
The engine is a Rotax 503UL-DCDI, mounted upside down as it is fitted with a 3 to 1 belt reduction drive. The propulsion is via a PProp wooden propellor.
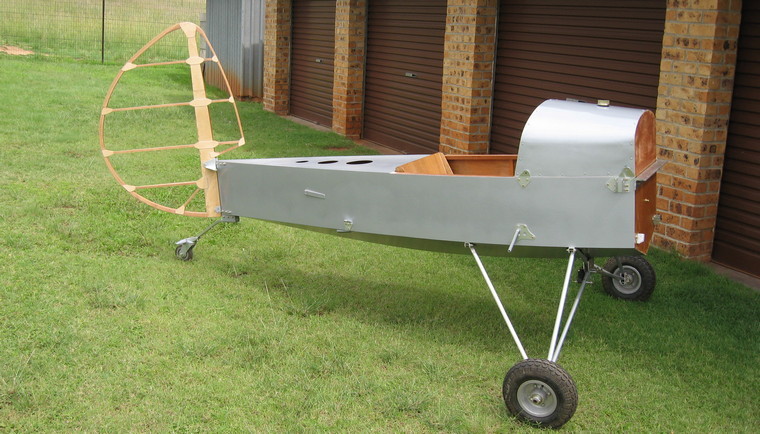
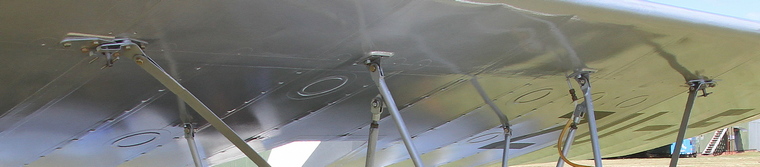
On her wheels
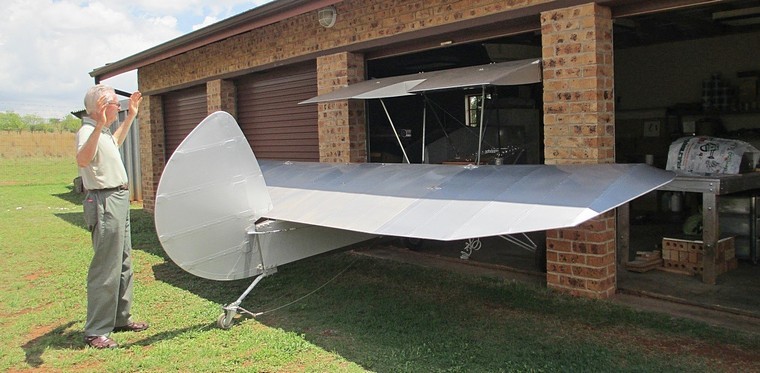
And substantially complete
This is my very first venture into aircraft construction, I am not a pilot and I had no prior contact with the aircraft industry, but the fact that a rookie like me can actually do so says a lot for the quality of the drawings and the construction notes, plus the tips on jigs and so forth. I also had tremendous support from Fred, who showed much tolerance in answering my many daft questions over the years I spent building ZU-FGX! Not least to mention is also the support I received from the late Mike Spence and my comrades in EAA Chapter 973.
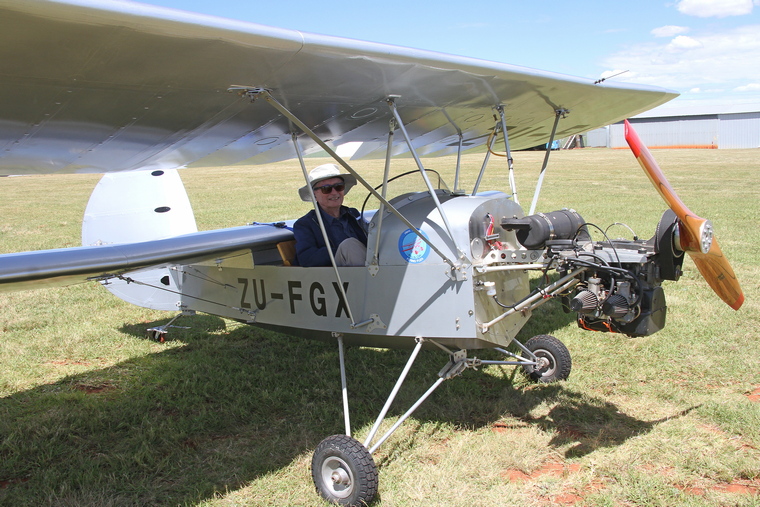
At FAKR after her maiden flight
And now in this testing phase, I wish to thank Dale de Klerk for doing the test flying and admire his bravery in flying an unconventional aircraft built by a novice. Ivan Hancock has also helped me tremendously by hangaring my aircraft at Orient, doing the AP requirements and guiding me through the final stages with the CAA.
Clearly the buddy system is alive and well in our aviation community and I would not have got this far without all the help.
www.youtube.com/channel/UCCuRVZAGodT6sztTeXBGeMw
and subscribe to our YouTube channel

 |
 |
 Copyright © 2024 Pilot's Post PTY Ltd
The information, views and opinions by the authors contributing to Pilot’s Post are not necessarily those of the editor or other writers at Pilot’s Post.
Copyright © 2024 Pilot's Post PTY Ltd
The information, views and opinions by the authors contributing to Pilot’s Post are not necessarily those of the editor or other writers at Pilot’s Post.